
Toys
From children to seniors
Toys are a communication tool.
Sloppy is attached with a magnet
A toy that rolls a ball.
The degree of freedom of the rolling rail is high,
The process of fine-tuning and aiming for success
You can enjoy it across generations.
Toys
From children to seniors
Toys are a communication tool.
Sloppy is attached with a magnet
A toy that rolls a ball.
The degree of freedom of the rolling rail is high,
The process of fine-tuning and aiming for success
You can enjoy it across generations.
Toys
From children to seniors
Toys are a communication tool.
Sloppy is attached with a magnet
A toy that rolls a ball.
The degree of freedom of the rolling rail is high,
The process of fine-tuning and aiming for success
You can enjoy it across generations.

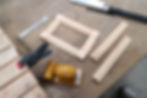
DIY Frames
Analog and innovative
Domestic cypress picture frame DIY set equipped with carpentry technology and Satafaku technology You can turn the steel door and refrigerator door of the entrance into an original gallery.
It's fun to be attached to the interior that I made myself.
It is good to make big things such as furniture, but
A small DIY kit is easy and recommended.
Saturday Factory products include patent pending.
There are two basic skills for production
"Paint a bond"
"Cut the paper with a cutter"

The raw material is hinoki cypress scraps from the carpenter's site, which is particular about domestic cypress wood.
You don't need a saw or nails to create a basic frame.
"Cleaning crying wood chips" does not come out.
There is no "striking sound such as a hammer".
"Unexpected vibration" does not occur.
It is a DIY set that takes into consideration the neighbors, so it is a friendly and ecological DIY set that can be used for nighttime rush work.
2 Various specifications are available.


DIY spec
Comes with a simple top material (left hand side) that is easy to customize. It is a set that makes it easy to create original picture frames that "engrave", "attach studs", and "paint different colors".


HOW TO
Tools to use
The basic work is only woodworking bond and cutter!
■ Cutter ■ Woodworking bond
When customizing after that □ Colored items such as paint and wax
□ Sandpaper
□ Saw
□ Pencil and ruler
□ Hammer
□ Pliers


① Put
Place the parts on thick paper so that you can imagine the finished product. If you can imagine the finished product, the finish will be much better.
If you want to use the frame material without cutting it, place two sheets of A4 size thick paper attached side by side so that the cut of the thick paper is near the center of the frame. This is the most durable way to put it.

② Paint
I'm sorry for the fingers that are hard to say beautiful.
Carefully apply the bond so that the edges do not stick out. Even if the part of the frame material (bar-shaped part) that sticks to the thick paper sticks out, it will be separated later, so relax and apply a squeaky bond.

③ Forget.
After firmly pressing the paperboard and wood materials, weigh them until the bond dries and secures, and wait firmly.
Press the frame material (bar-shaped parts) and the top material (square parts) so that they are in close contact with each other, and then put a weight on them to make a solid frame.
Place a heavy, solid and flat object close to you on the weight.
The trick is not to wait. If you wait, it's still good, it's good, it's good. And in my case. Do something else and forget to play, sleep or wait.
By the way, I was making a picture frame! Please remove the weight at that time. The curing time varies depending on the performance of the bond used, so if you read the explanation written on the back of the bond etc. roughly, you can be confident in the timing to remove the weight.
* If the bond is not dried properly, the paint will get into the adhesive surface during the process of applying the paint, and the bond will be weakened.
* Ishiya, who is not good at woodworking, is appointed as the production model. Therefore, the weight in the photo is a "broken stone". Use something familiar to you, such as stacking solid books. It seems that a familiar heavy object was a broken stone.

④ Cut
You don't need a ruler.
Attach a cutter to the edge of the frame and cut the thick paper as if you were cutting it with a ruler.
Professionals don't cut at once. Lightly cut the top half of the paper once and cut it a second time.
If you use the cutter blade after folding it, it will be finished beautifully.

POINT
Inside the frame, there are four difficult-to-cut parts called "inside corners". If you try to cut to the end as it is in the photo, the frame and cutter will hit and the inside corner at the bottom of the photo will not cut well.
After cutting to the middle, turn the frame around and apply a cutter firmly to the inside corner to cut.

⑤ Finish
The frame is completed for the time being!
Look at the work.
If you are concerned about the protruding part of the thick paper, use a file to scrape the thick paper.
If you want to complete it as it is, attach the magnet tape attached to the set to the thick paper on the back of the frame.
* When painting or decorating, please attach the magnet tape at the end.
The material of the frame is Japanese cypress. You can use various paints, stains, waxes, etc. for finishing.
You can do elaborate painting such as aging painting, or you can give a natural finish with beeswax wax.

decoRATION

Brass and copper "small nails"
"Decorative studs" with patterns and patterns
You can use small hardware on the market for decoration.
Since it is difficult to drive small nails, you can work comfortably by making a small hole with a thumbtack first.
If you combine "small nails" and "decorative studs", your originality will expand infinitely.


POINT
Even if you find a nice little nail or decorative stud, it may be longer than the frame material and penetrate. In such a case, please cut it with pliers. Especially brass and copper are soft kinds of metals. It runs out unexpectedly.
If it is too shiny and shy, it is recommended to paint it. If you file it after it dries, you will feel a sense of spoilage.
The decorative studs may be just right to remove the original color a little.

RESIZE

There are various shapes of things that you want to decorate.
It's not always square.
You can cut and change the material to an original size that is difficult to find in a commercially available picture frame.
Two skills are required to resize.
"Cut with a saw" "File"
The biggest difficulty is "cutting with a saw", but cypress wood is relatively easy to process, so please try resizing it.
File the cut sections and corners for a clean finish.

POINT
Anyway, the more you can cut "straight" and "vertical", the better the frame will be. However, it is surprisingly difficult to cut straight and vertically.
There are tools for cutting straight and vertically, but we recommend a saw with a torso.
There is a frame on the back side of the saw, which suppresses the wobbling of the saw while cutting. Please try.
After cutting, chamfer with a file for a three-dimensional finish.


真鍮の小さい釘を使用しています。

飾り鋲を使用しています。

ペンキのみのデコレーションしていない状態です。
フレームをカットすると小さい額縁を作ることができます。
大工が下準備して�いますので、お好みに仕上げてください。

フレームをカットればお好きなバランスで額縁を作ることができます。

material
Lumberjack and carpenter
Japanese cypress wood has been used by forestry workers for decades.
Sometimes over a hundred years
Beyond generations It has been carefully raised.
Sticking to such domestic cypress wood
The carpenter who builds the building is also
I am trying to make good use of the materials without waste.
From the scraps produced when processing beams and columns
The material of this picture frame is made.
Uneven scraps one by one
The carpenter processes it by hand.
From lumberjack to carpenter,
And it is a material that continues from carpenters to customers.
We hope you enjoy using it.
Photo courtesy of cypress forest
Lumberjack in Hinohara Village, Tokyo
